
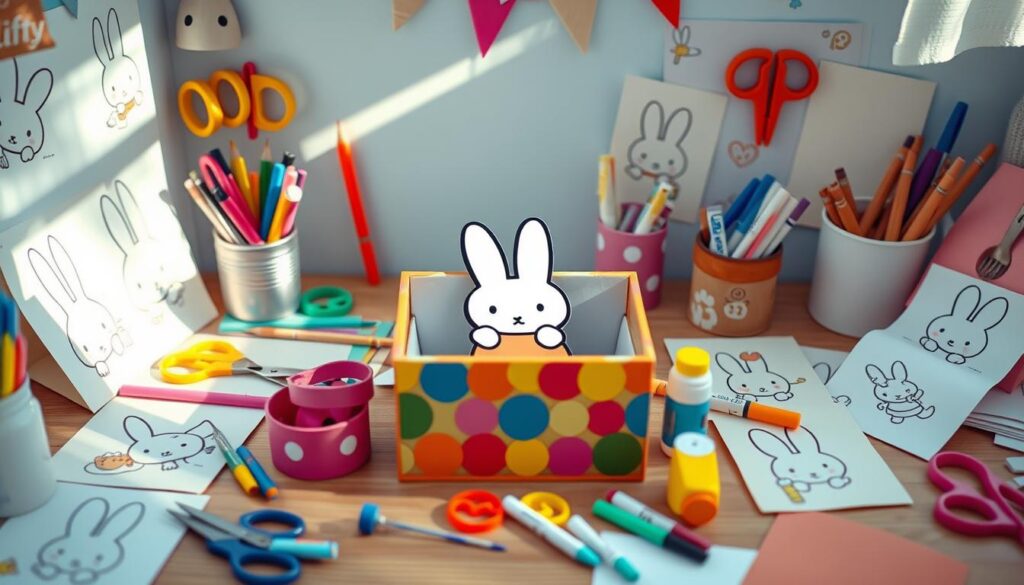
You can make a unique DIY Miffy box, perfect for Miffy fans. It’s easy to do with simple materials and basic skills. You can use it to store small things or as a gift. This project is fun for everyone, no matter your age or skill level.
Creating a DIY Miffy box is a fun and rewarding activity. It lets you show off your creativity and make someone happy. It’s a great way to have fun with family and friends.
Introduction to the DIY Miffy Box Craft
Key Takeaways
- You can create a unique DIY Miffy box with simple materials and basic crafting skills.
- This Miffy craft project is great for people of all ages and skill levels.
- Making a DIY Miffy box is a fun and rewarding experience.
- You can use your DIY Miffy box to store small items or give as a gift.
- This fun craft idea is an excellent way to spend quality time with family and friends.
- You can express your creativity and bring a smile to someone’s face with a DIY Miffy box.
Introduction to the DIY Miffy Box Craft
Starting a DIY box project is a fun and creative journey. The Miffy DIY craft is a great example. It lets you make a box with Miffy, the beloved character. This project is a wonderful way to show your creativity and add a personal touch to your box.
The Miffy DIY craft is easy and fun for everyone. You’ll need basic skills like cutting, gluing, and painting. It’s best to spend a few hours on this project. With patience and effort, you’ll create a beautiful DIY box.
What Makes Miffy Boxes Special
Miffy boxes are unique because they mix simplicity with creativity. This project is perfect for beginners. With simple materials and basic skills, you can make a beautiful Miffy box.
Skill Level and Time Requirements
This project is easy for anyone to do. You’ll need a few hours, but it’s worth it. As you work, you’ll relax and show your creativity.
Age Recommendations
This project is good for kids aged 6 and up with adult help. It’s also great for adults looking for a fun activity. It’s a wonderful way to spend time with family and friends, making memories together.
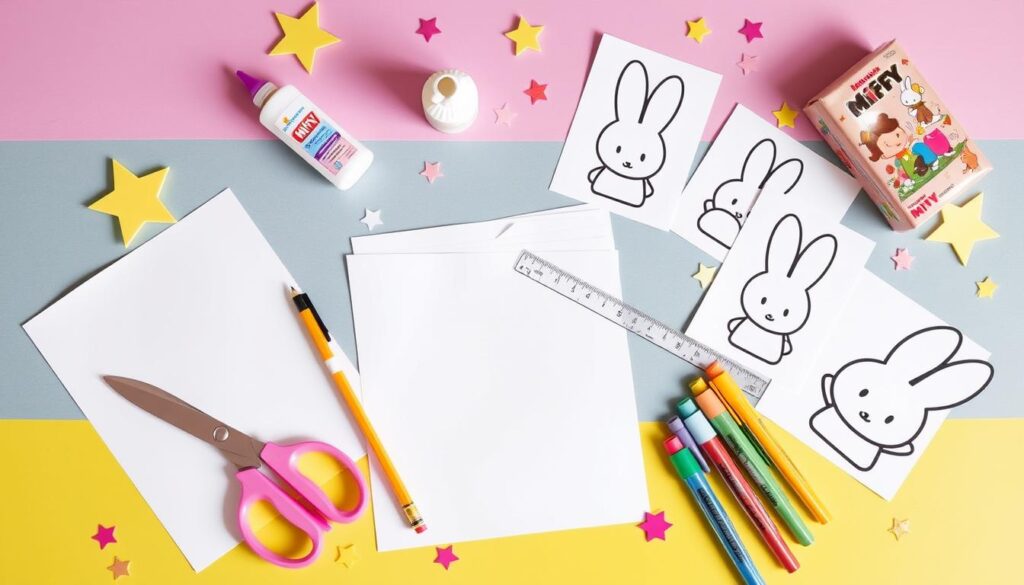
Essential Materials and Tools Needed
To start your DIY Miffy box project, you’ll need some basic stuff. You’ll need a wooden or paper box, paint, glue, scissors, a paintbrush, and a pencil. You can find these DIY materials at craft stores or online. For extra flair, add stickers, ribbons, or buttons to your Miffy craft project.
You’ll also need a printed template of Miffy’s face and ears. You can find these online or make your own using box craft methods. Having everything ready before you start will make the crafting fun and easy. Here’s what you’ll need to begin:
- Wooden or paper box
- Paint and paintbrush
- Glue and scissors
- Pencil and printed template of Miffy’s face and ears
- Decorative items like stickers, ribbons, or buttons
Make sure to pick DIY materials that fit your skill level and what you want your Miffy craft to look like. With these basics, you’re ready to make a unique and special box craft piece.
Preparing Your Workspace for the Miffy Box Project
To start your DIY Miffy box project, prepare your workspace first. This makes crafting safe and fun. Protect your work surface from spills and ensure good air flow.
As you start this fun craft, set up your area with everything you need close by. This keeps you focused and lets you dive into the creative process.
Safety Considerations
When crafting your DIY Miffy box, remember some key safety tips. These include:
- Wearing protective gloves to prevent skin irritation
- Using a mask to avoid inhaling fumes from paint or glue
- Keeping your work area well-ventilated
Setting Up Your Crafting Area
To enjoy your craft fully, set up your area for comfort and efficiency. This might mean:
- Using a comfortable and ergonomic chair
- Positioning your work surface at a comfortable height
- Keeping your tools and materials organized and within reach

Organization Tips
Keep your workspace tidy as you work on your DIY Miffy box. This helps you stay focused and enjoy making it. Clean up as you go and store your stuff in a designated spot.
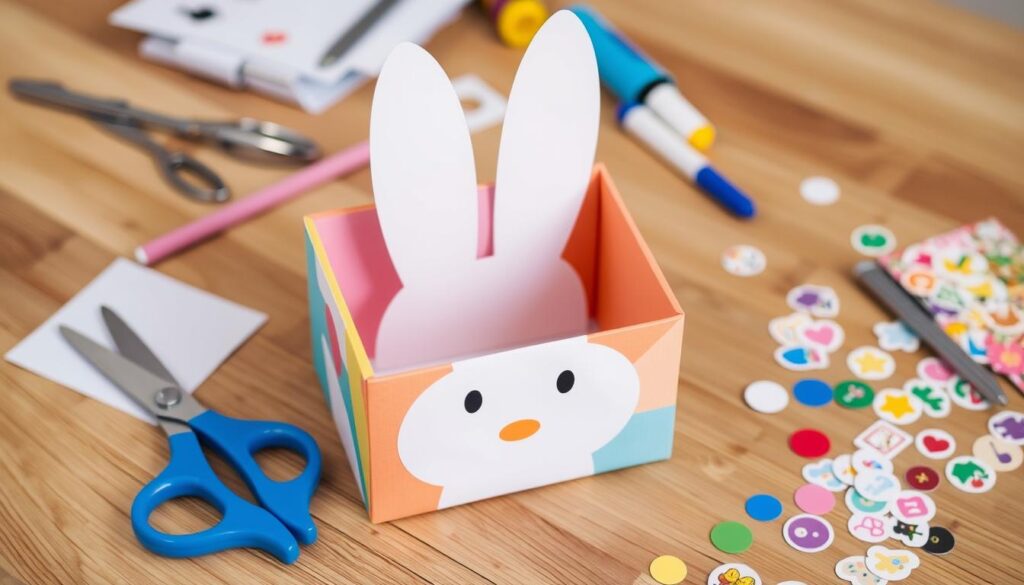
Creating the Basic DIY Miffy Box Structure
To begin your DIY Miffy box, first assemble the box if it’s not ready. This is key in your Miffy box tutorial. It sets the base for your craft. After assembling, prime and paint the box. Pick a color that fits Miffy’s character.
Here are steps for a polished finish:
- Prime the whole box, letting it dry before painting.
- Paint it with a color that fits your design.
- Wait for the paint to dry before moving on.
Once painted and dry, decorate with Miffy’s face and ears. This is when your craft project really shines. Follow the instructions closely and take your time. Remember, patience and detail are crucial for a great DIY Miffy box.

By following these steps, you’ll make a lovely, sturdy box. It’s great for storing small things or showing off your Miffy love. Enjoy your crafting!
| Step | Description |
|---|---|
| 1 | Assemble the box (if necessary) |
| 2 | Paint the box with primer and paint |
| 3 | Decorate the box with Miffy’s face and ears |
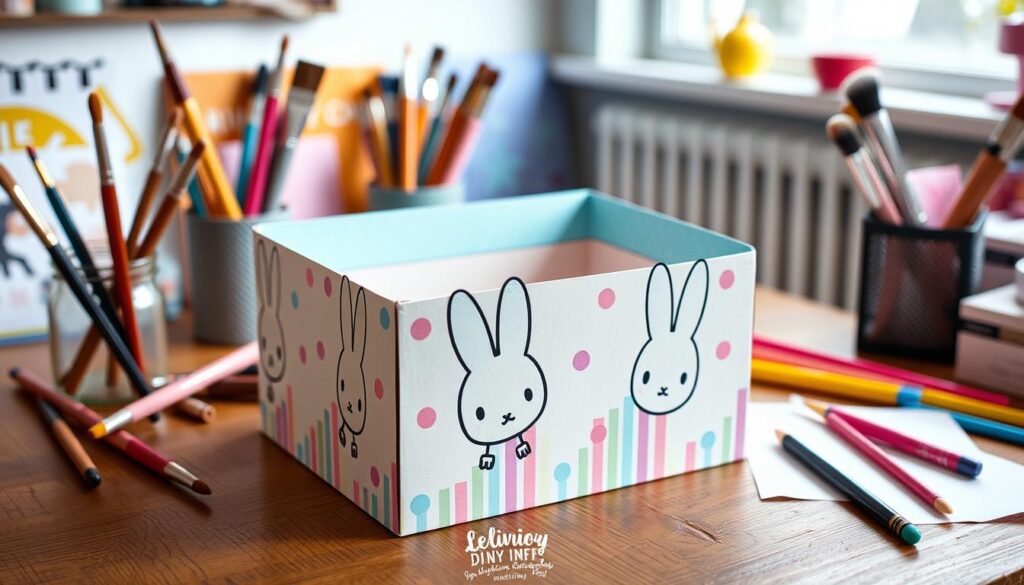
Designing Your Miffy Box Features
Now that you have the basic structure of your DIY Miffy box, it’s time to add fun and creative features. This is where your Miffy craft skills can really shine. Start by drawing Miffy’s face on the box, using a pencil and a marker. Make sure to capture the character’s iconic features, such as the big eyes and the sweet smile.
A fun craft idea is to add the signature ears, which are a distinctive part of Miffy’s design. You can use cardboard or paper to create the ears and attach them to the box. To add some personality to your Miffy box, try creating a happy smile or a curious gaze. With a little practice and patience, you will be able to create a Miffy box that looks just like the character from the books and TV shows.

- Use a variety of colors to make your Miffy box stand out
- Add some texture to your box using fabric, felt, or other materials
- Don’t be afraid to experiment and try new things – it’s all part of the DIY Miffy box experience
Remember, the most important thing is to have fun and be creative with your Miffy craft project. With these tips and a little imagination, you can create a unique and adorable Miffy box that showcases your personality and style.
Decorative Techniques and Color Schemes
Now that you’ve built the basic structure and designed your Miffy box, it’s time to think about decoration. You can use paint, markers, or stickers to add color and personality. Bright and bold colors can match Miffy’s cheerful vibe. Or, softer pastel colors can offer a more subtle look.
Decorative techniques are endless. You can add ribbons or buttons for a unique touch. For intricate designs, use Miffy DIY templates or stencils. With creativity and experimentation, your Miffy box will stand out.
Here are some tips for choosing a color scheme for your craft tutorial:
- Consider the occasion: Think about the recipient’s favorite colors if it’s a gift.
- Think about the theme: Pastel colors might be perfect for a baby shower.
- Don’t be afraid to experiment: Try different color combinations to find the best fit for your design.
Remember, the key to a beautiful Miffy box is to have fun and be creative. Don’t hesitate to try new things and experiment with materials and techniques. With these tips and practice, you’ll create a stunning DIY box that shows off your personality and style.
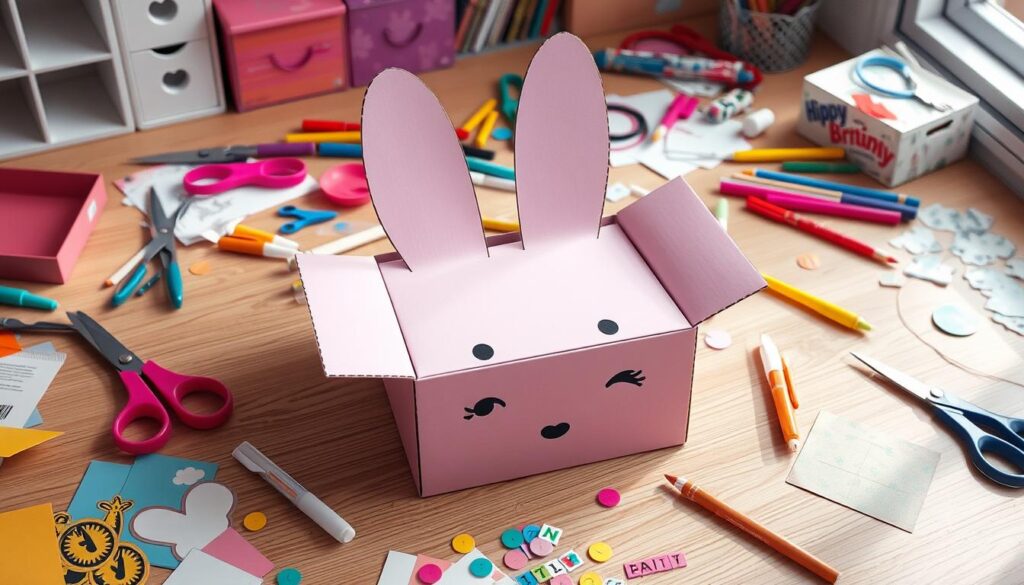
Adding Personal Touches to Your Miffy Box
Now that you’ve made the basic Miffy box, it’s time to add personal touches. This is where your creativity can really shine. You can add glitter or stickers to make it festive and special.
With this fun craft, you can try different themes like birthdays or holidays. For example, add holly or snowflakes for a seasonal look. This makes your DIY Miffy box a unique gift or decoration.
Embellishment Ideas
- Glitter or stickers to add a pop of color
- Ribbons or bows to create a cute and playful look
- Photos or other personal mementos to make it extra special
Remember, the most important thing is to have fun and be creative. Don’t be afraid to try new things and explore different ideas. With a little imagination, you can make a DIY Miffy box that’s truly unique and personalized.
Troubleshooting Common Challenges
Working on your DIY box might bring up some common issues. Don’t worry, these can be fixed with patience and practice. When tackling a Miffy DIY project, being ready for small problems is key.
A DIY box is a fun and creative project. But, it can get frustrating when things don’t turn out right. If you mess up, like painting outside the lines or gluing something wrong, you can fix it. Use correction fluid or start over.
Fixing Mistakes
- Use correction fluid to fix small mistakes
- Start again if the mistake is significant
- Take a break and come back to the project with fresh eyes
Adjusting the size of your Miffy DIY project can also be tricky. If your DIY box isn’t quite right, you can trim or add to the edges. With some troubleshooting and problem-solving, you’ll make a Miffy box that looks perfect and professional.

Adjusting Proportions
Remember, patience and practice are key to a successful craft project. Don’t be afraid to make mistakes – they can lead to new ideas. With these tips and a bit of creativity, you’ll make a beautiful and unique DIY box.
Creative Ways to Use Your Miffy Box
Now that you’ve made your DIY Miffy box, it’s time to think about its uses. You can store small items like jewelry or stationery in it. It’s also a great gift box for special occasions, making it a thoughtful present.
With a bit of imagination, your DIY Miffy box can be used in many ways. Here are a few ideas to get you started:
- Use it as a decorative item, such as a centerpiece or a wall hanging, to add a touch of personality to your room.
- Fill it with small toys or treats and use it as a fun surprise for a child.
- Use it to store small mementos or keepsakes, such as photos or coins.
Your Miffy box is a unique and special creation. With a little creativity, you can find many different uses for it. Whether you use it to store small items, as a gift box, or as a decorative item, your DIY Miffy box is sure to bring a smile to your face and add a touch of fun to your daily life.

Remember, the possibilities are endless, and it’s up to you to decide how you want to use your Miffy box. So don’t be afraid to think outside the box and come up with your own unique and creative ways to use your DIY Miffy box. With a little imagination and creativity, you can turn your Miffy craft into a truly one-of-a-kind creation.
Conclusion: Celebrating Your Handmade Miffy Creation
Congratulations on making your own DIY Miffy box! You should be proud of your Miffy craft. It shows your creativity and hard work.
Display your craft with confidence. It’s a unique piece that shows your personality. It can be a decorative accent or a fun storage solution.
Enjoy the satisfaction of making something by hand. This project not only made a charming item but also improved your skills. It shows the joy of DIY creativity.
FAQ
What makes Miffy boxes special?
Miffy boxes are special because they mix simplicity with creativity. They are fun for everyone, no matter their age or skill level. The Miffy character’s design and happy personality make these DIY projects unique.
What is the recommended skill level and time required for this project?
This DIY Miffy box project is easy. You need basic skills like cutting, gluing, and painting. It’s great for kids aged 6 and up with adult help, or for adults wanting a fun activity. It takes a few hours, depending on how detailed you want it.
What materials and tools are needed to make a DIY Miffy box?
You’ll need a box, paint, glue, scissors, a brush, and a pencil. You also need a Miffy face and ears template. You can find these online or make your own. You might also want stickers, ribbons, or buttons for extra flair.
How do I prepare my workspace for the Miffy box project?
Before starting, make sure your workspace is safe. Protect your surface from spills and have good air flow. Arrange your tools and materials neatly to work efficiently.
How do I create the basic structure of the DIY Miffy box?
Building the basic structure is simple. First, put together the box if it’s not already done. Then, paint it with primer and paint. Once dry, decorate with your Miffy template.
How do I design the features of my Miffy box?
Designing your Miffy box is where you get creative. Draw Miffy’s face on the box with a pencil and marker. Make sure to include big eyes and a smile. Add the ears and give Miffy a special expression.
What decorative techniques and color schemes can I use for my Miffy box?
You can use paint, markers, or stickers to decorate your box. Choose bright colors for a cheerful look or soft colors for a subtle vibe. Add ribbons or buttons for a personal touch.
How can I add personal touches to my Miffy box?
Personal touches make your Miffy box special. Add glitter or stickers for a festive look. Try different themes like birthdays or holidays. Seasonal decorations like holly or snowflakes can also add a special touch.
How can I troubleshoot common challenges when making my DIY Miffy box?
Don’t worry about mistakes like painting outside the lines. Use correction fluid or start over. If the box is off, trim or add to the edges to fix it.
How can I use my completed Miffy box?
Your finished Miffy box can be used in many ways. Store small items like jewelry or stationery in it. Or, use it as a gift box or a decorative item to brighten up your space.